A Better Top-Bar Hive Comb Guide / Starter Strip
When I started beekeeping I started with a top-bar hive. While far less common than the traditional Langstroth box style hive, I figured it would be less expensive to build (around $50 as compared to $200) and if I didn’t like beekeeping, I wouldn’t have invested a lot, so no big deal. I picked up Wyatt Mangum’s book and got started. It turns out I love it and have been at it for years.
In a top-bar hive, bees attach their comb directly to the bars which form the roof of the hive. Because of this, the bees can pass around the sides of the comb but not over the top. Beekeepers that use Langstroth style hives will often say that top-bar hives are unsuitable for the overwintering of bees because when the cluster reaches the top of the comb they will run out of food stores because they can’t pass over the top and move to the next comb. Of course this is how the cluster moves from comb to comb in a Langstroth hive so if that is your only experience keeping bees I guess it’s a reasonable assumption.
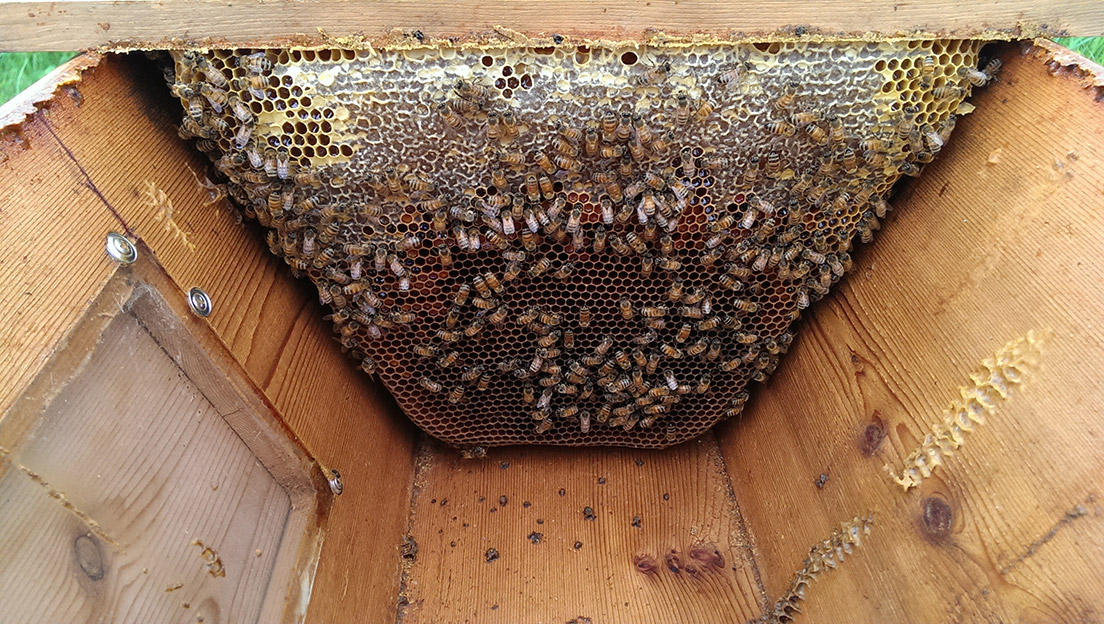
In truth, while in a top-bar hive the bees normally can’t pass over the top of the comb, a strong colony will just pass around one side or the other – so normally not being able to pass over the top hasn’t been a big deal in my top-bar beekeeping experience. But what about those weaker colonies? If their cluster doesn’t span to the side of the comb, then perhaps they will indeed get stuck, run out of food stores, and perish. It was this problem that I set out to solve.
A Better Top-bar Hive Comb Guide – A Passage at the Top of the Comb
The bars of most top-bar hives use a comb guide or starter strip of some sort to encourage the bees to draw their comb straight – in alignment with the bar. Starter strips are generally made from a thin strip of wood (like a popsicle stick) or from wax foundation that has been hot-waxed to the bar (which is a time consuming, messy operation).
I set out to make a simple to install top-bar hive comb guide that would incorporate a spacer of some sort that would create a passage at the top of the comb, with a shape and dimension that the bees wouldn’t close up. I figured if the height of the passage was a bee space (about 3/8 of an inch) and there was a horizontal plane below the top-bar that was about the width of the comb, the bees would leave the passage open. Interestingly, while there are all sorts of passage patents out there, there were none that covered this configuration, creating a space between the top-bar and the comb – so I have submitted a patent to the U.S. Trademark and Patent office (but that’s another blog post) and can now legally say this part is Patent Pending.
I designed the first prototype with a free online 3D program (Autodesk Tinkercad) and sent the part out to print. Once I received the print I created a silicone mold from the prototype and made several copies that could be used in a hive. This first prototype went the full-width of the bar and works great. The bees draw their comb beautifully from it and leave the passage wide-open.


The only thing I didn’t like about this first prototype was that the passage runs the full length of the bar so it takes six screws to ensure that the strip stays properly connected.
I imagined that if I could shorten the passage and make it so the bees could also build their comb directly from the bar for a portion of the length it would be a stronger bond and would take fewer screws (hopefully only two). Back to Tinkercad and the 3D printer I went and came up with the below design.
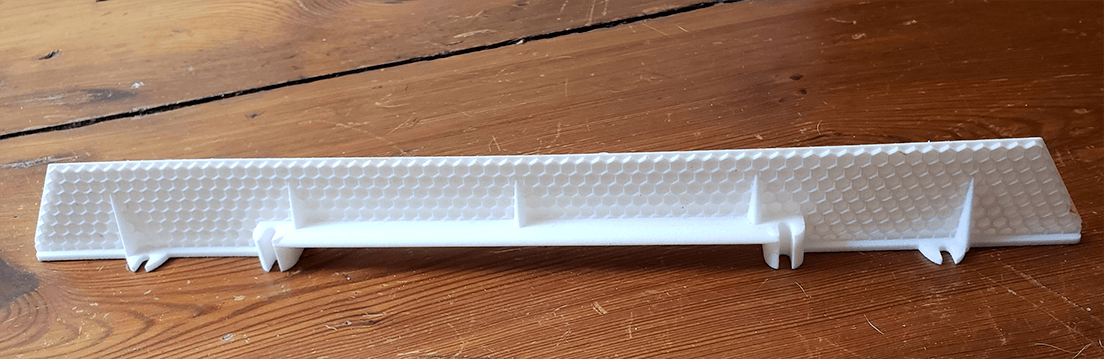
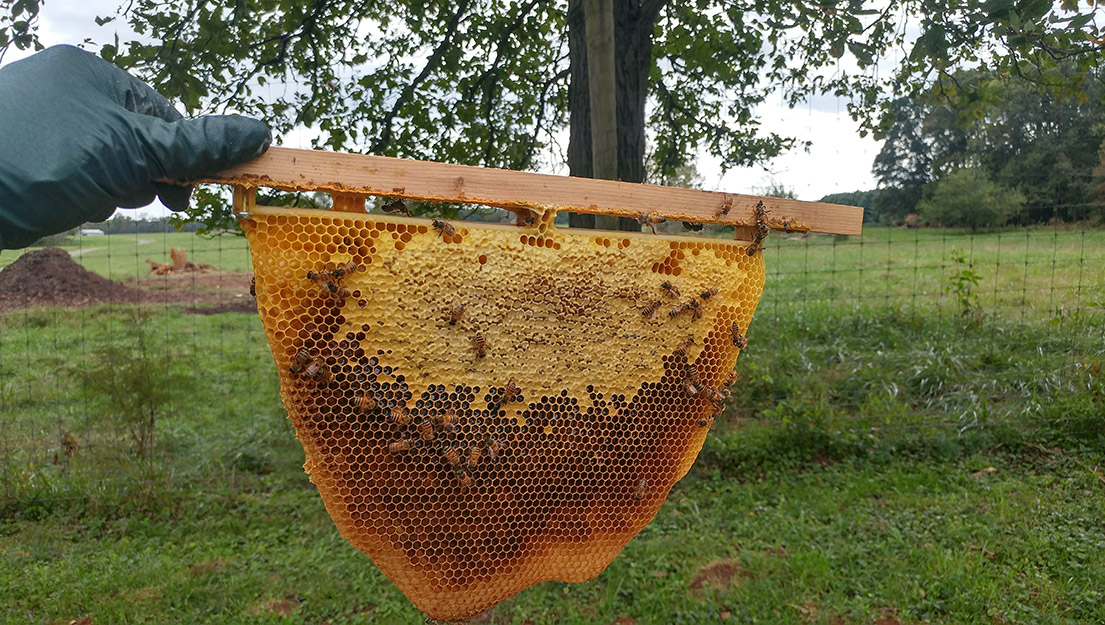
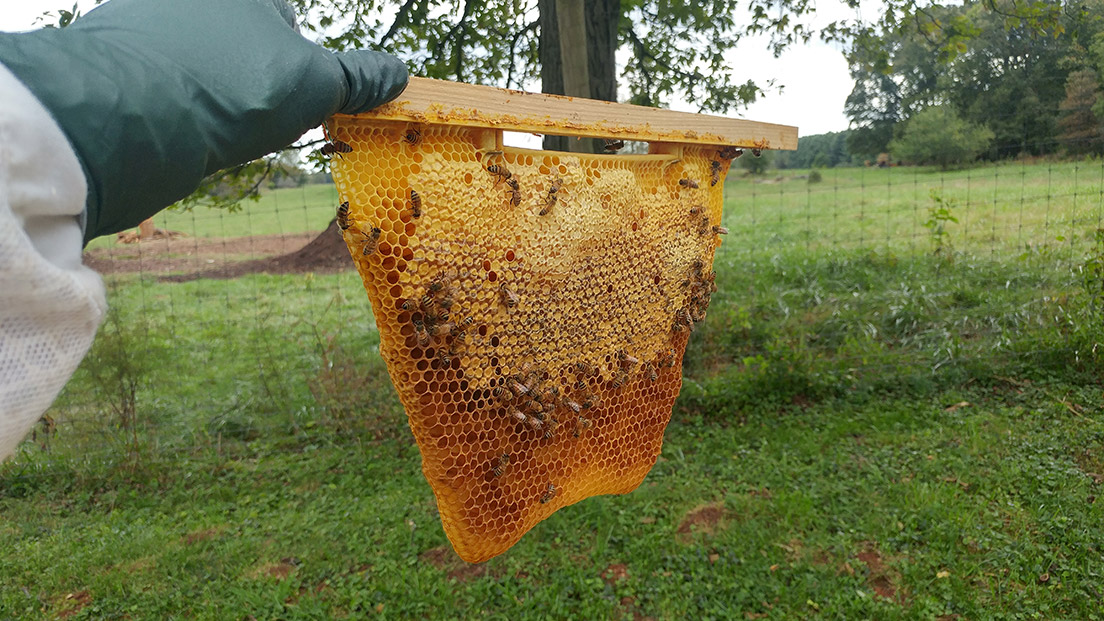
This version works great as well. The bees took to it, drew their comb straight and left the passage wide open, and it could be secured with only two screws (although I usually used four). You will note that in this version I made the starter strip much longer than that of the first prototype. This resulted in an undesirable side effect – the bees don’t immediately attach their comb to the base of the strip at the outer edges. As you can see in the below photo, the comb is still quite thin near the top bar. In this version, only when the comb gets completely drawn do the bees fully attach the comb to the bar.
To correct this I cut down the starter strip on a couple of prototypes and installed them in colonies – Perfection! It works beautifully.
Creating An Inexpensive, Winter Passage, Top-Bar Hive Comb Guide
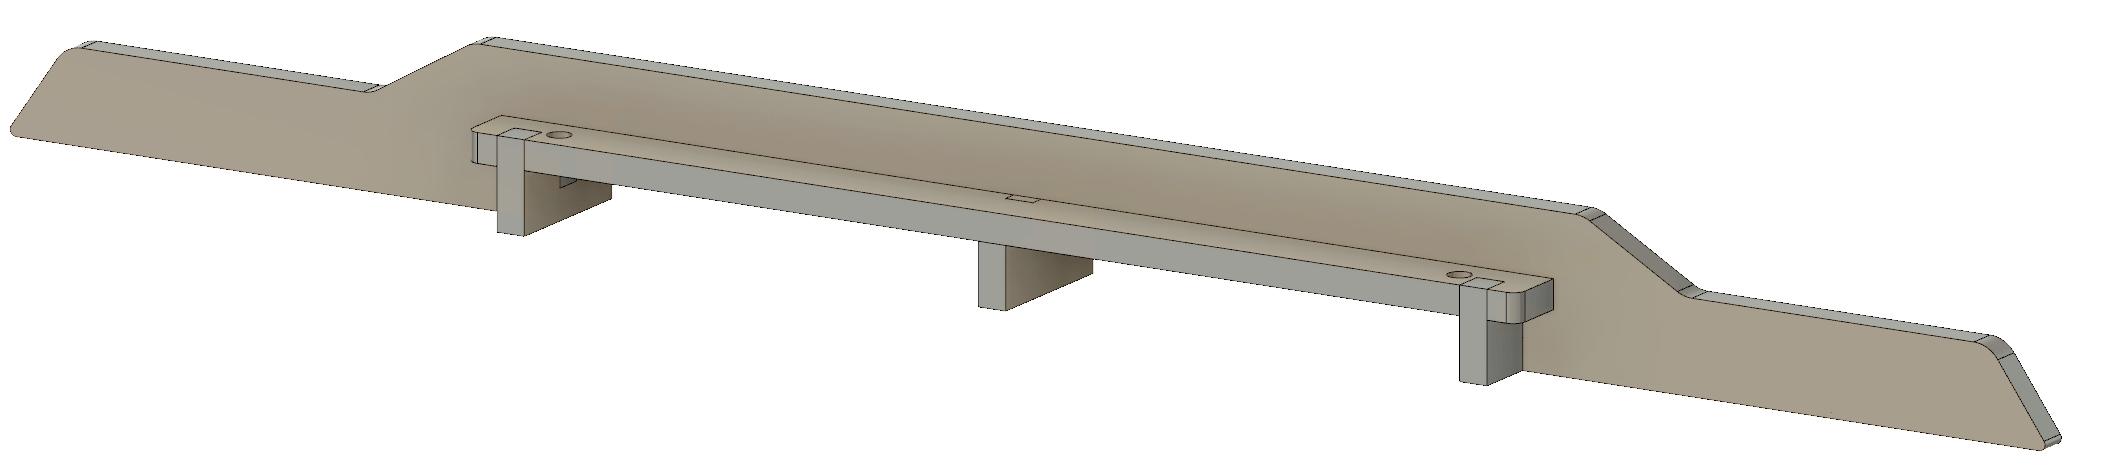
I redesigned the 3D version with the shorter comb guide so I could make one last prototype and get quotes for injection molding the piece.

Um…wow! Injection molds are expensive! Short production runs are expensive too! And while I think this is a great idea, there just aren’t that many top-bar beekeepers around, so I can’t imagine this is going to be a super high-volume part. I guess I should have looked into this aspect of the manufacturing process earlier. I don’t think anyone is going to pay $5 to $10 for a single strip.
How to create an inexpensive comb guide? Replicating them from my silicone molds is slow and the epoxy isn’t exactly cheap, so that option is out. I began experimenting with small bits of wood, short wood blocks, and cutting up plastic foundation – too much labor, too many little bits, and far too many opportunities to lose a finger with the table saw. Plus, having exact dimensions for the passage are critical to ensuring the bees leave it open – there was too much room for error doing the work by hand. Somewhere in this process I realized that this could probably be done with a laser cutter if I were to redesign the piece a bit (and get access to a laser cutter).
A Laser Cut Top-Bar Hive Comb Guide
Step 1 – find and learn a new CAD design program. I downloaded AutoDesk Fusion 360 and took the online tutorials (which are great). From there I designed a new comb guide assembly.
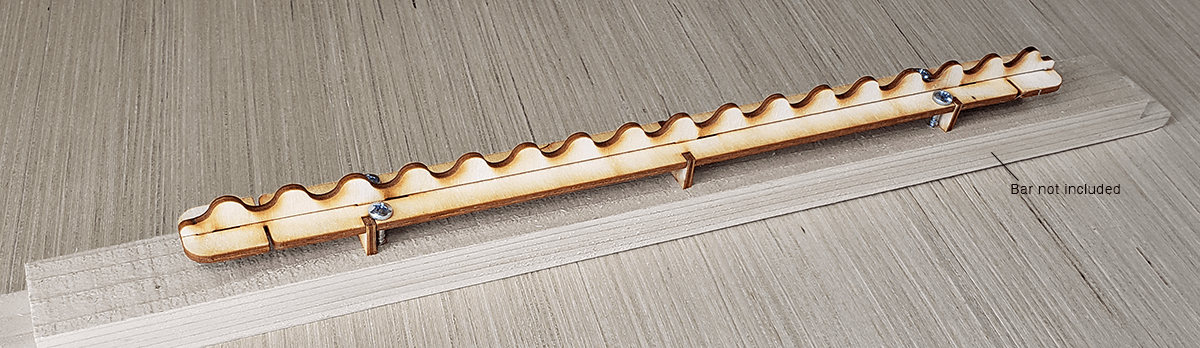
Fortunately my home town has a really good makerspace (Makersmiths) with an excellent laser cutter. I have been able to knock out all sorts of prototypes with it. Small changes have made a big difference in how well this piece can be produced and assembled.
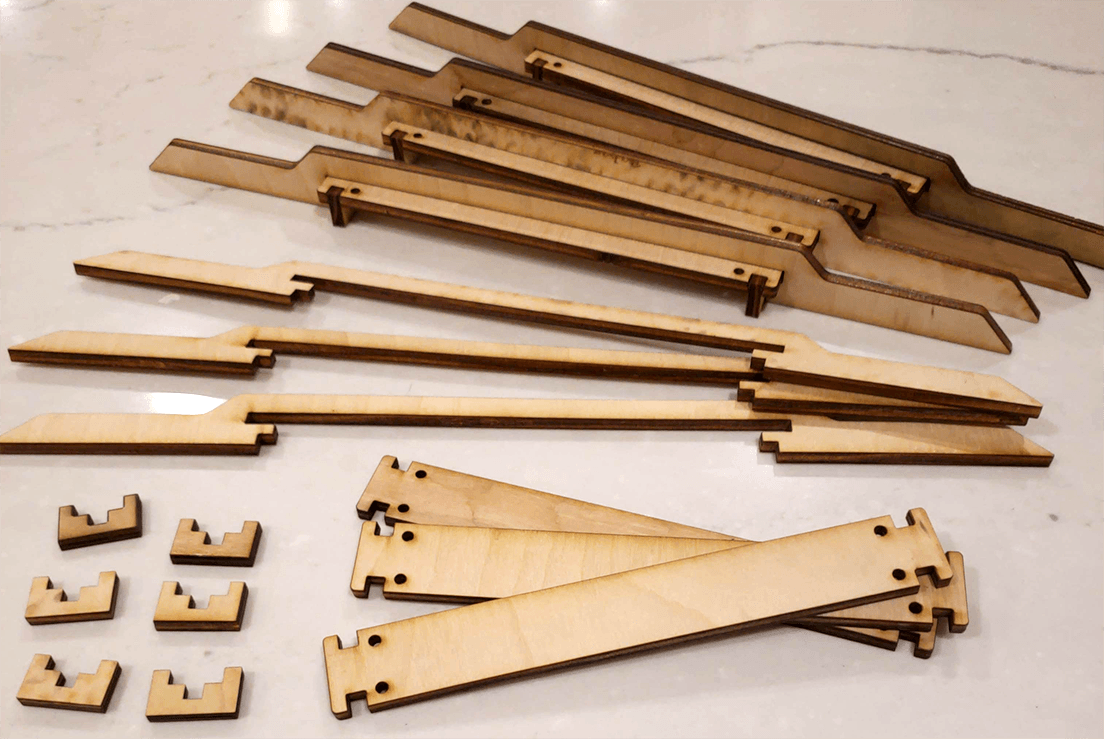
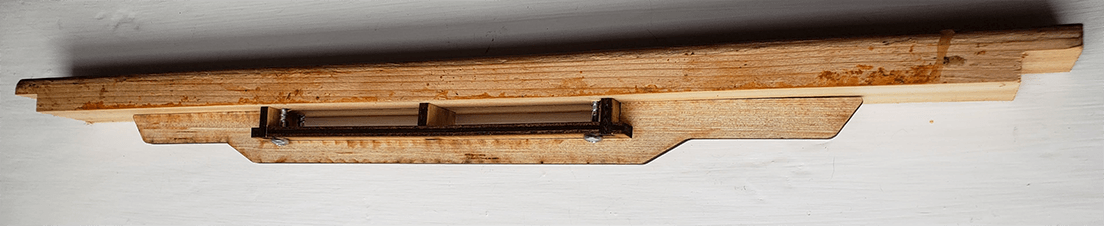
It is no longer a single piece, but because it is cut so precisely it can be quickly and easily assembled and installed. The dimensions (the strip height, thickness, passage height, width, length) are all exactly the same as they were before so while I haven’t had the opportunity to install this in a colony yet (come on spring – hurry up) I have zero doubt that this version will suit the bees perfectly. Here’s a photo of one attached to a top-bar.
The other nice thing about the laser cutter approach is that with the CAD program, I can quickly change dimensions and output new versions. I can produce shorter length versions for narrower top-bar hive bodies (like the dimensions recommended by Michael Bush) or longer ones for wider bodies (like those preferred by Wyatt Mangum). I can also produce strips to order if people want a specific length. Finding the right screws was a journey deserving of its own blog entry (coming soon).
It’s Nearly Time to Start Selling
If you would like to order some comb guides, click here. The latest version works outstandingly well and is a whole lot less hassle than waxing in starter strips. I hope you like them.